

Hello Dear Friends welcome to Gadgetsprime today in this article we are talking about How to protect Windows 10 and 11 PCs from ransomware. Ransomware is running rampant, but there are several ways individuals and admins can protect their Windows 10 and 11 PCs. Here’s what to do.
CryptoLocker. WannaCry. DarkSide. Conti. MedusaLocker. The ransomware threat isn’t going away anytime soon; the news brings constant reports of new waves of this pernicious type of malware washing across the world. It’s popular in large part because of the immediate financial payoff for attackers: It works by encrypting the files on your hard disk, then demands that you pay a ransom, frequently in Bitcoin or other cryptocurrency, to decrypt them.
But you needn’t be a victim. There’s plenty that Windows 10 and 11 users can do to protect themselves against it. In this article, I’ll show you how to keep yourself safe, including how to use an anti-ransomware tool built into Windows.
(Administrators, see “What IT needs to know about ransomware and Windows” at the end of this article.)
This article assumes that you’re already taking the basic precautions against malware in general, including running anti-malware software and never downloading attachments or clicking links in email from unknown senders and suspicious-looking email. Also note that this article has been updated for the Windows 10 November 2021 Update (version 21H2) and the Windows 11 October 2021 Update (version 21H2). If you have an earlier release of Windows 10, some things may be different.
Use controlled folder access
Microsoft is concerned enough about ransomware that it built an easy-to-configure anti-ransomware tool directly into Windows 10 and Windows 11. Called controlled folder access, it protects you by letting only safe and fully vetted applications access your files. Unknown applications or known malware threats aren’t allowed through.
By default, the feature is not turned on, so if you want to protect yourself against ransomware, you’ll have to tell it to get to work. And you can customize exactly how it works by adding new applications to its whitelist of programs that can access files, and adding new folders in addition to the ones that it protects by default.
To switch it on, you’ll need to access Windows Security. There are several ways to get to it in both Windows 10 and Windows 11:
- Click the up arrow on the left side of the taskbar, then click the Windows Security icon — a shield.
- Click Start > Settings to open the Settings app, then select Update & Security > Windows Security in Windows 10 or Privacy & Security > Windows Security in Windows 11.
- Use Windows Search. In Windows 10, the search box is in the taskbar next to the Start button. In Windows 11, click the search icon on the taskbar to open the search pane. Type windows security into the search box next and select Windows Security from the results.
In Windows Security, select Virus & threat protection. Scroll down to the “Ransomware protection” section and click Manage ransomware protection. From the screen that appears, under “Controlled folder access,” toggle the switch to On. You’ll get a prompt asking if you want to make the change. Click Yes.
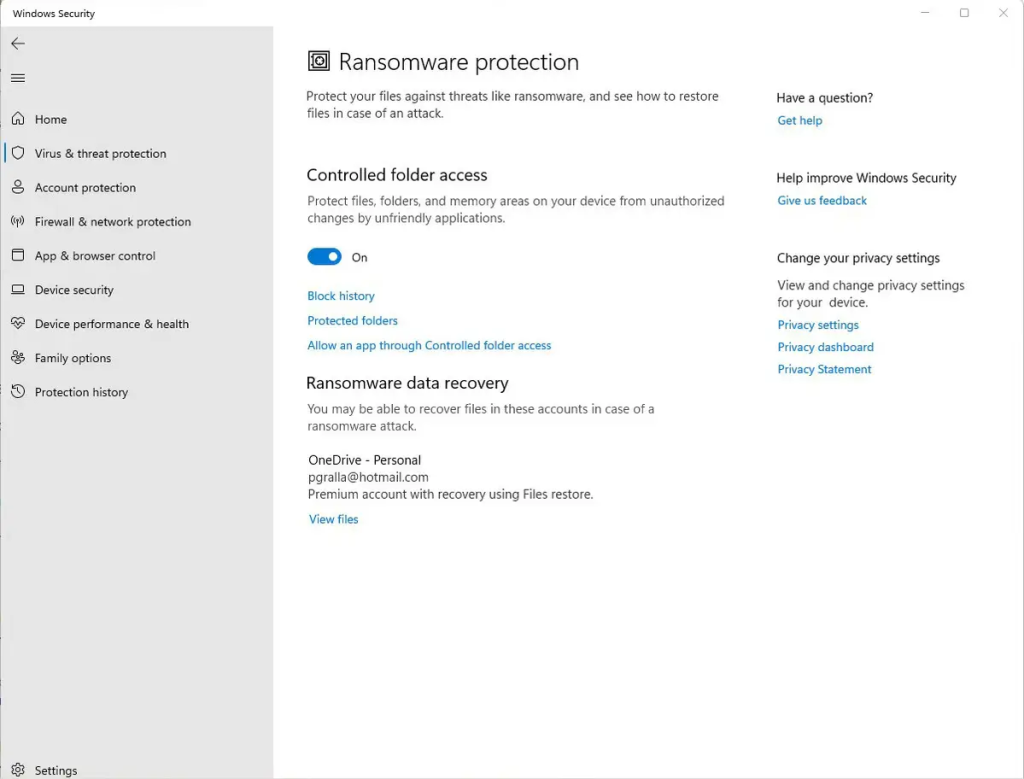
You shouldn’t leave it at that and feel safe yet, because there’s a chance that you have folders you’d like to protect that the feature ignores. By default, it protects Windows system folders (and folders underneath them) like C:\Users\UserName\Documents, where UserName is your Windows user name. In addition to Documents, Windows system folders include Desktop, Music, Pictures, and Videos.
But all your other folders are fair game for any ransomware that makes its way onto your PC. So if you use Microsoft’s OneDrive cloud storage, for example, any OneDrive folders and files on your PC aren’t protected. Given that Microsoft is trying to move everyone it can onto OneDrive, this is a surprising omission.
To add folders you want protected, click the Protected folders link that appears after you switch on controlled folder access. A prompt appears asking if you want to make the change. Click Yes. Click the Add a protected folder button that is on top of the list of protected folders that appears, then navigate from the screen that appears to the folder you want to protect and click Select Folder.

Continue to add folders in this way. Remember that when you add a folder, all folders underneath it are protected as well. So if you add OneDrive, for example, there’s no need to add all of the folders underneath it.
(Note: Depending on your version of OneDrive, you may be able to restore OneDrive files, even if you don’t control them with controlled folder access. For details, see the Microsoft documentation “Restore deleted files or folders in OneDrive.”)
If you decide at any point to remove a folder, get back to the “Protected folders” screen, click the folder you want to remove, and then click Remove. Note that you won’t be able to remove any of the Windows system folders that are protected when you turn the feature on. You can only remove the ones that you’ve added.
Microsoft determines which applications should be allowed access to protected folders, and unsurprisingly, among them is Microsoft Office. Microsoft hasn’t published a list of which applications are allowed, though, so consider taking action to let applications you trust access your files.
To do it, go back to the screen where you turned on controlled folder access and click Allow an app through Controlled folder access. A prompt appears asking if you want to make the change. Click Yes. From the screen that appears, click Add an allowed app, navigate to the executable file of the program you want to add, click Open, and then confirm you want to add the file. As with adding folders to the list of protected folders, you can remove the app by getting back to this screen, clicking the application you want to remove, then clicking Remove.
Hint: If you’re not sure where executable files are located for programs you want to add to the whitelist, look for the folder name with the program’s name in the Windows\Program Files or Windows\Program Files (x86) folders, then look for an executable file in that folder.
Back up… but do it properly
The whole point of ransomware is to hold your files hostage until you pay to unlock them. So one of the best protections from ransomware is to back up your files. That way, there’s no need to pay the ransom, because you can easily restore your files from the backup.
But when it comes to ransomware, not all backups are created equal. You need to be careful about choosing the right backup technique and service. It’s a good idea to use a cloud-based storage and backup service rather than only backing up to a drive attached to your PC. If you back up to a drive attached to your PC, when your PC gets infected with ransomware, the backup drive will likely be encrypted along with any other disks inside or attached to your PC.
Make sure that your cloud-based storage and backup uses versioning — that is, it keeps not just the current version of each of your files, but previous ones as well. That way, if the most current version of your files gets infected, you can restore from previous versions.
Most backup and storage services, including Microsoft OneDrive, Google Drive, Carbonite, Dropbox and many others, use versioning. It’s a good idea to get familiar with the versioning feature of whichever service you use now, so you can easily restore files in a pinch.

Get free ransomware protection
Just about any anti-malware program includes built-in anti-ransomware protections, but there are several programs that promise to specifically target ransomware. A number of them are paid, but there are also some free options, such as those I’m listing here.
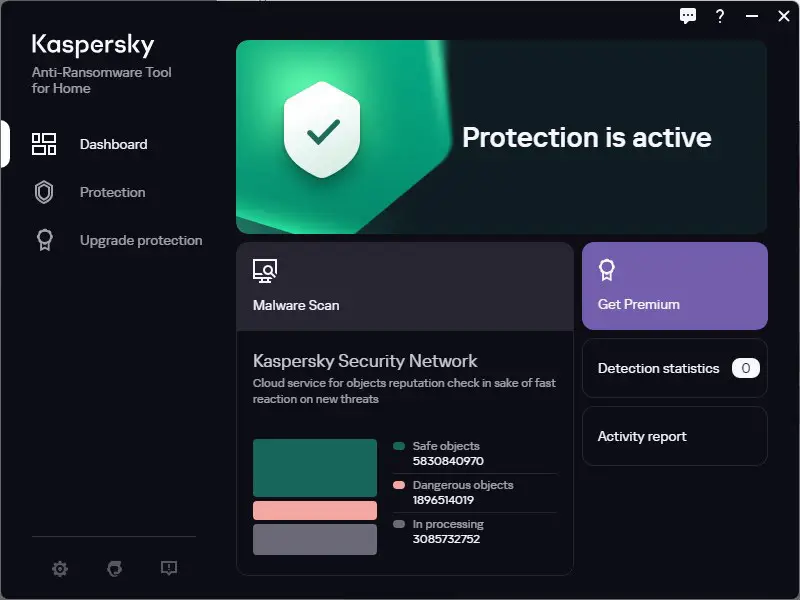
Bitdefender offers free decryption tools that can unlock your data if you’ve been attacked by ransomware and it’s being held ransom. They can only decrypt data that’s been encrypted with certain specific pieces or families of ransomware, including REvil/Sodinokibi, DarkSide, MaMoCrypt, WannaRen and several others. And Kaspersky offers anti-ransomware software for free for both home and business users, although there are limitations on the number of devices you can use it on.
Stay patched
Microsoft regularly releases Windows 10 and Windows 11 security patches, and they’re automatically applied via Windows Update. But if you hear about a ransomware outbreak, you shouldn’t wait for Windows Update to work — you should immediately get the update yourself so that you’re protected as soon as possible. And it’s not just Windows updates you want to get. You also want to make sure Windows Security, Microsoft’s built-in anti-malware tool, has the latest anti-malware definitions.
To do both in Windows 10, go to Settings > Update & Security > Windows Update and click the Check for updates button. In Windows 11, go to Settings > Windows Update and click the Check for updates button. (If updates are already waiting for you, you’ll see them listed instead of the Check for updates button.) If Windows finds updates, it installs them. If it requires a reboot, it will tell you.

You need to worry not just about Windows staying patched, but other software as well. If you use an anti-malware program other than Windows Security, make sure it and its malware definitions are up to date.
And the other software on your PC should be kept up to date as well. So check how each piece of software gets updated and make sure to update each one regularly.
Disable macros in Microsoft Office
Ransomware can be spread via macros in Office files, so to be safe you should turn them off. Microsoft now disables them by default, but that doesn’t necessarily mean that they’re turned off in your version of Office, depending on when you installed it and whether you’ve updated it. To turn them off, when you’re in an Office application, select File > Options > Trust Center > Trust Center Settings and select either Disable all macros with notification or Disable all macros without notification. If you disable them with notification, when you open the file you’ll get a message warning that the macros were disabled and letting you turn them on. Only turn them on if you’re absolutely sure they’re from a safe, trusted source.

Bottom line
The good news in all this: Windows 10 and Windows 11 have specific anti-ransomware features built right in. Follow the advice we’ve outlined here to keep the ransomware threat at bay.
This article was originally published in January 2018 and most recently updated in August 2022.
This article was all about Protect Windows. How to protect Windows 10 and 11 PCs from ransomwar. This advice has hopefully been useful to you.